Navigate the interface beta
The visual editor interface contains an operator toolbar, operators, canvas, built-in AI, and more to help you create dbt models through a seamless drag-and-drop experience in dbt Cloud.
The visual editor provides users with a seamless and visual, drag-and-drop experience inside dbt Cloud. It's available in private beta for dbt Cloud Enterprise accounts.
To join the private beta, register your interest or reach out to your account team to begin this process.
This page offers comprehensive definitions and terminology of user interface elements, allowing you to navigate the dbt Cloud visual editor landscape with ease.
The visual editor interface is composed of:
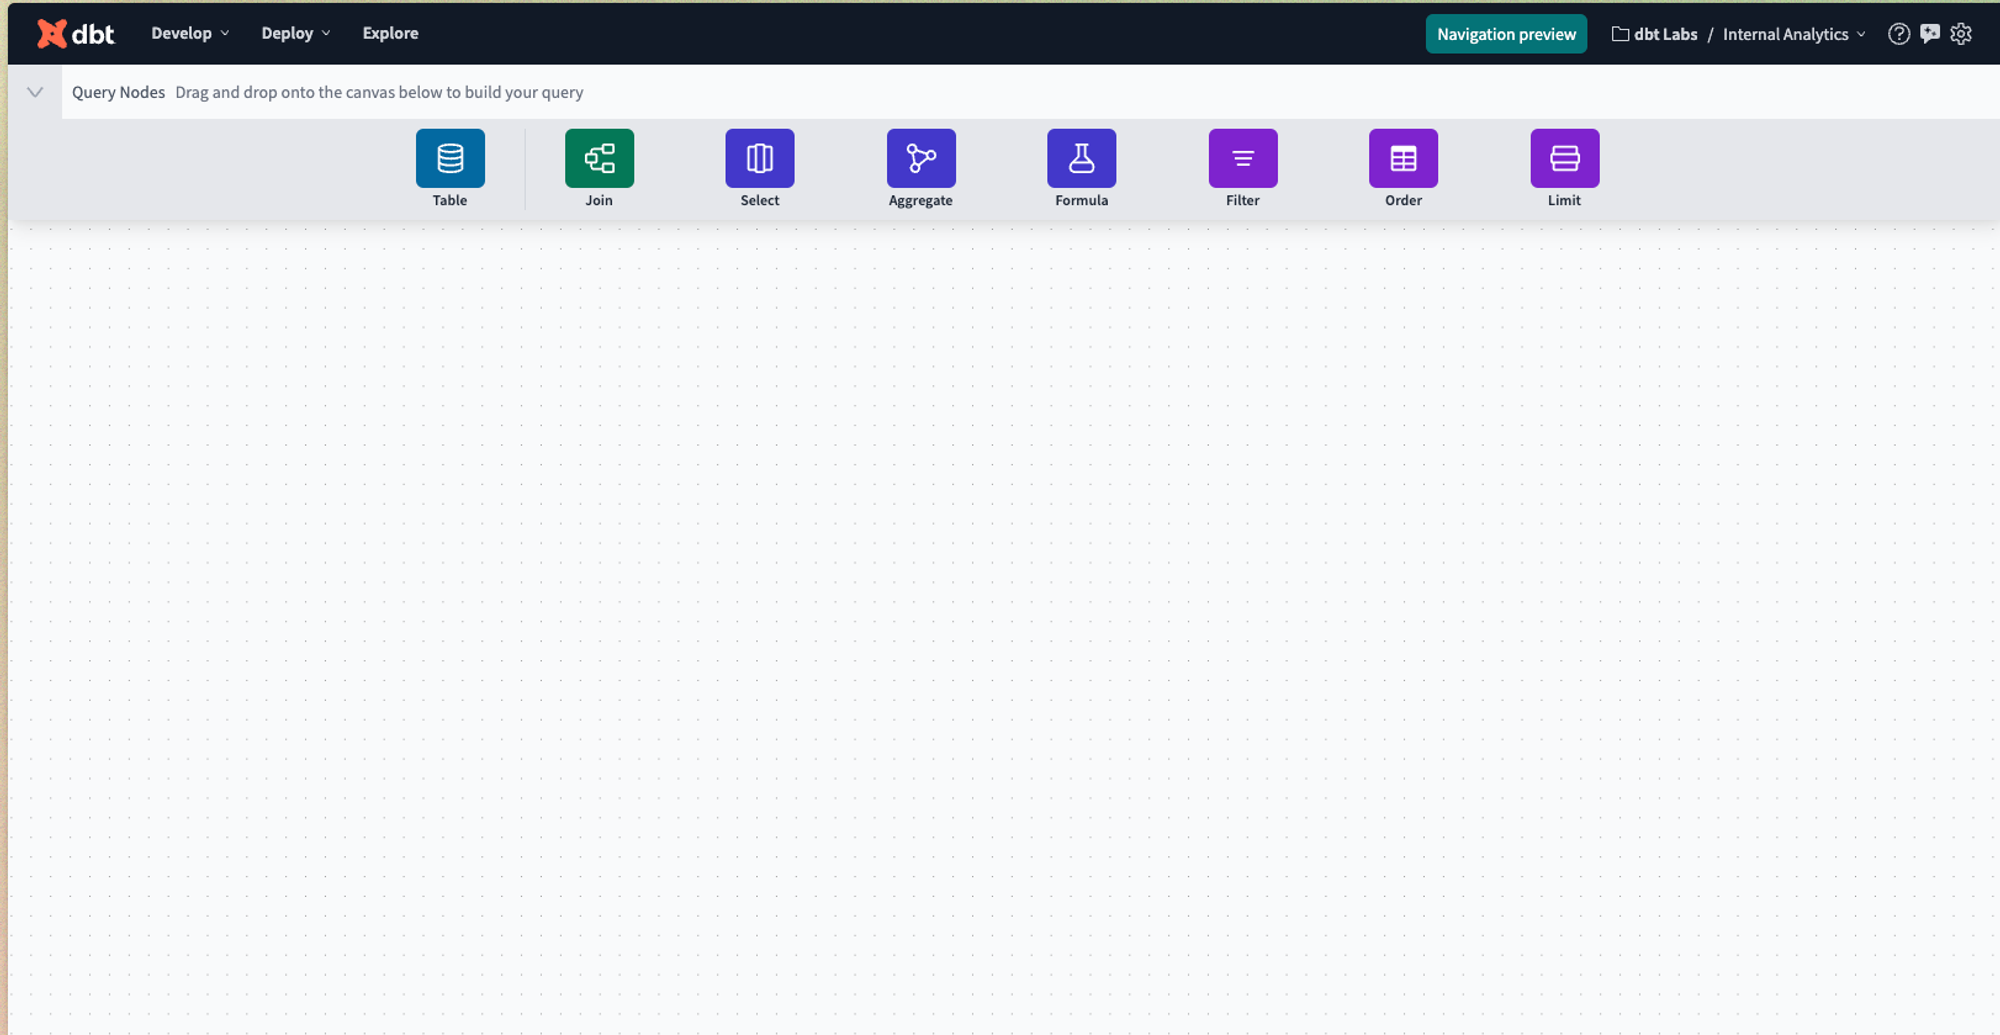
- Operator toolbar — Located at the top of the interface, the toolbar displays all the nodes available. Use the toggle on the left of the toolbar to display or hide it.
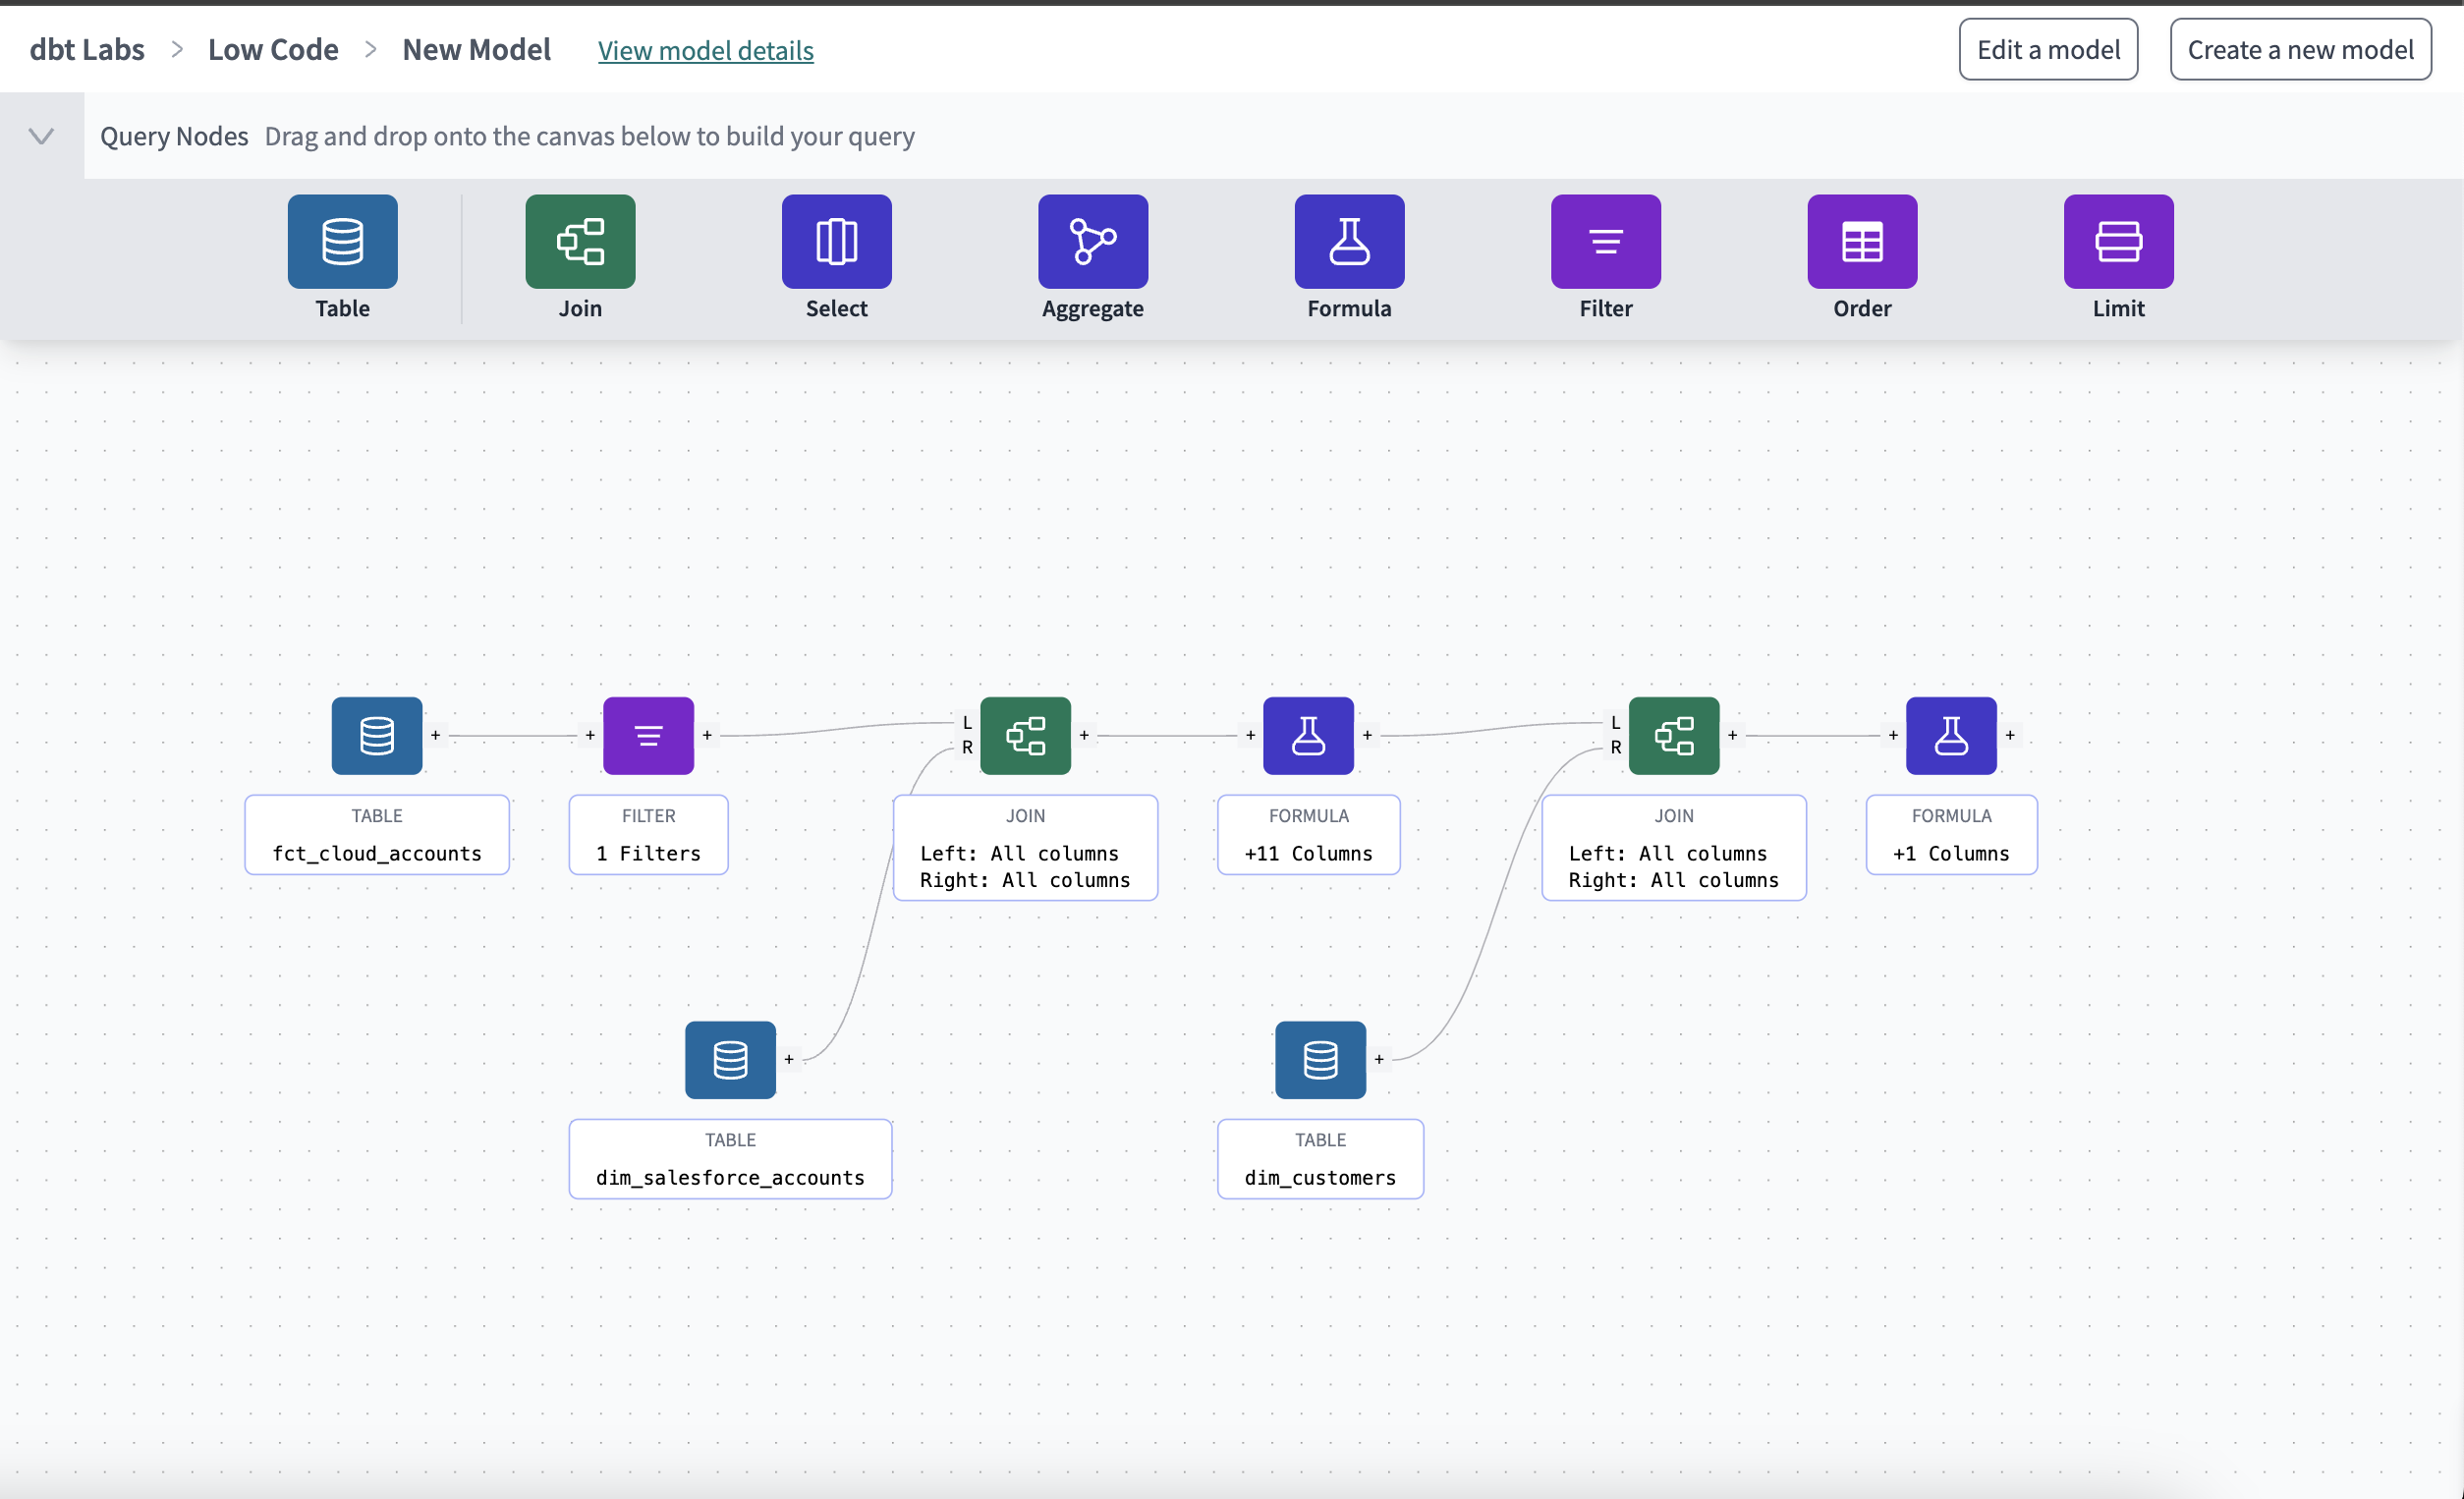
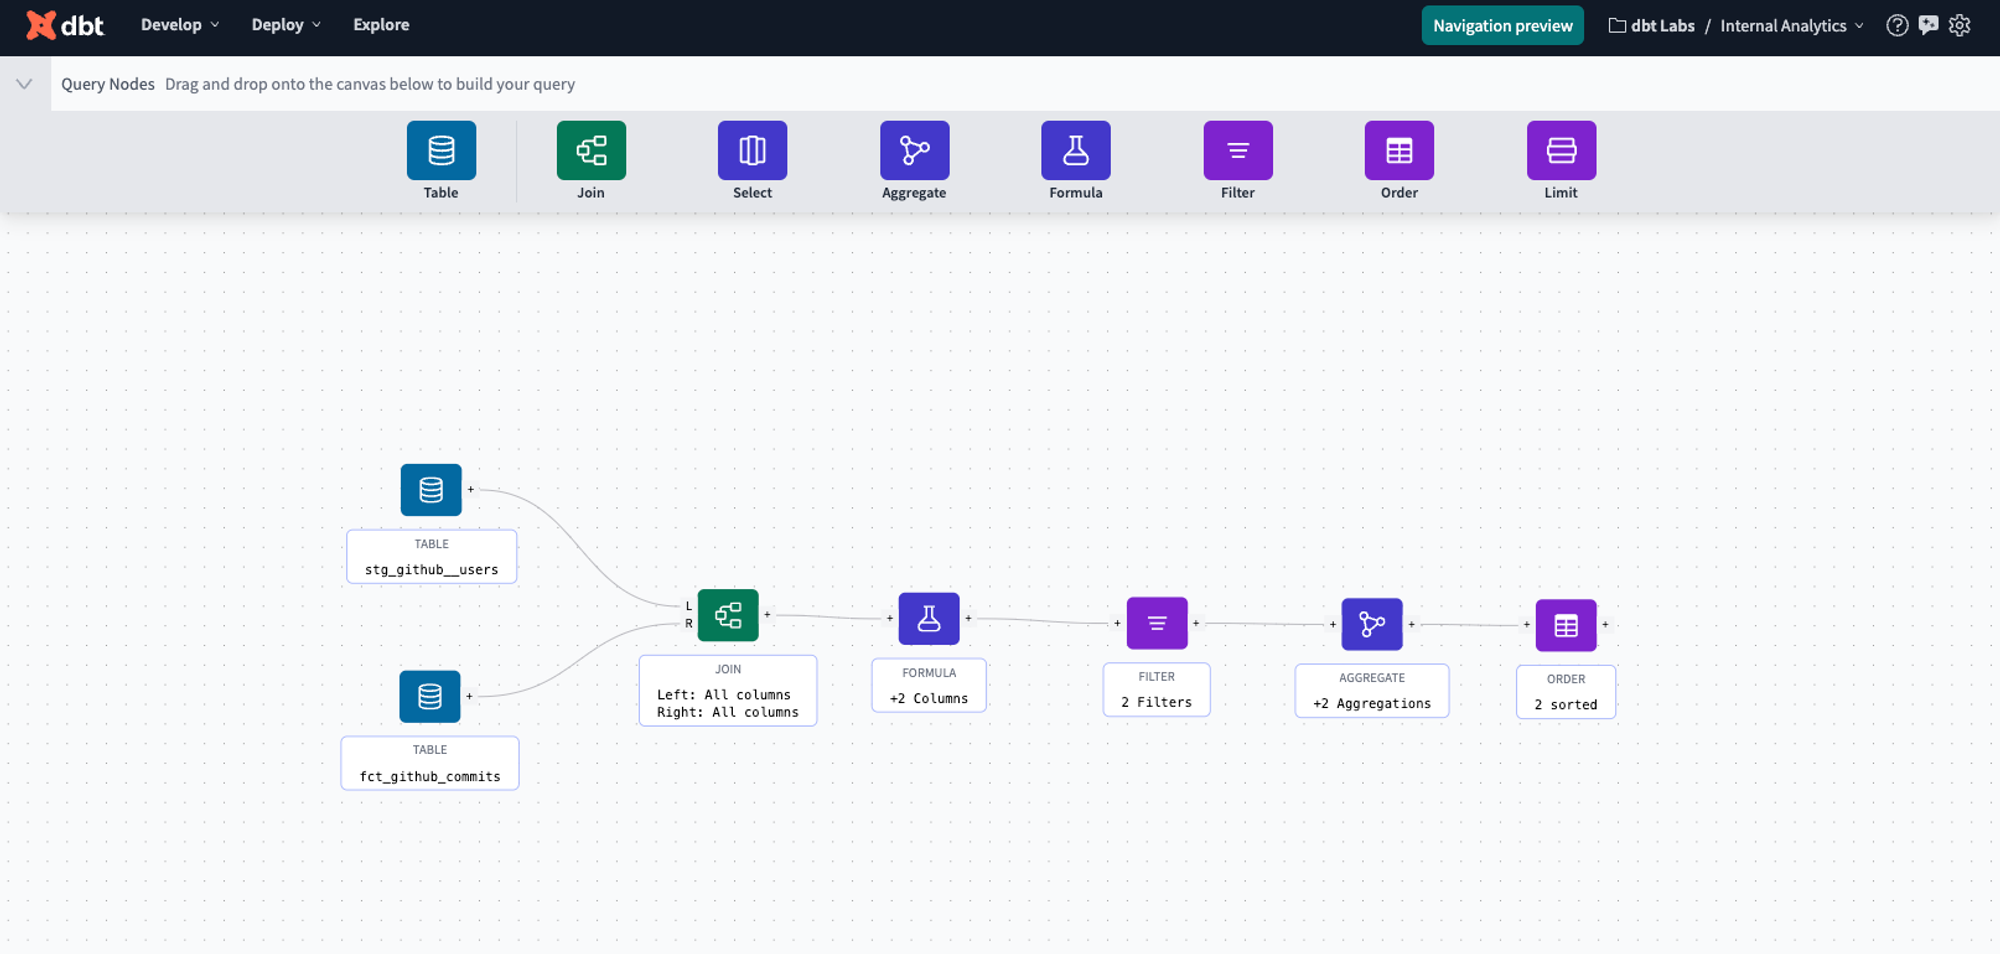
- Operators — perform specific transformations or configurations (such as table, join, aggregate, filter, and so on). Use connectors to link the operators and build a complete data transformation pipeline.
- Canvas — The main whiteboard space below the node toolbar. The canvas allows you to create or modify models through a sleek drag-and-drop experience.
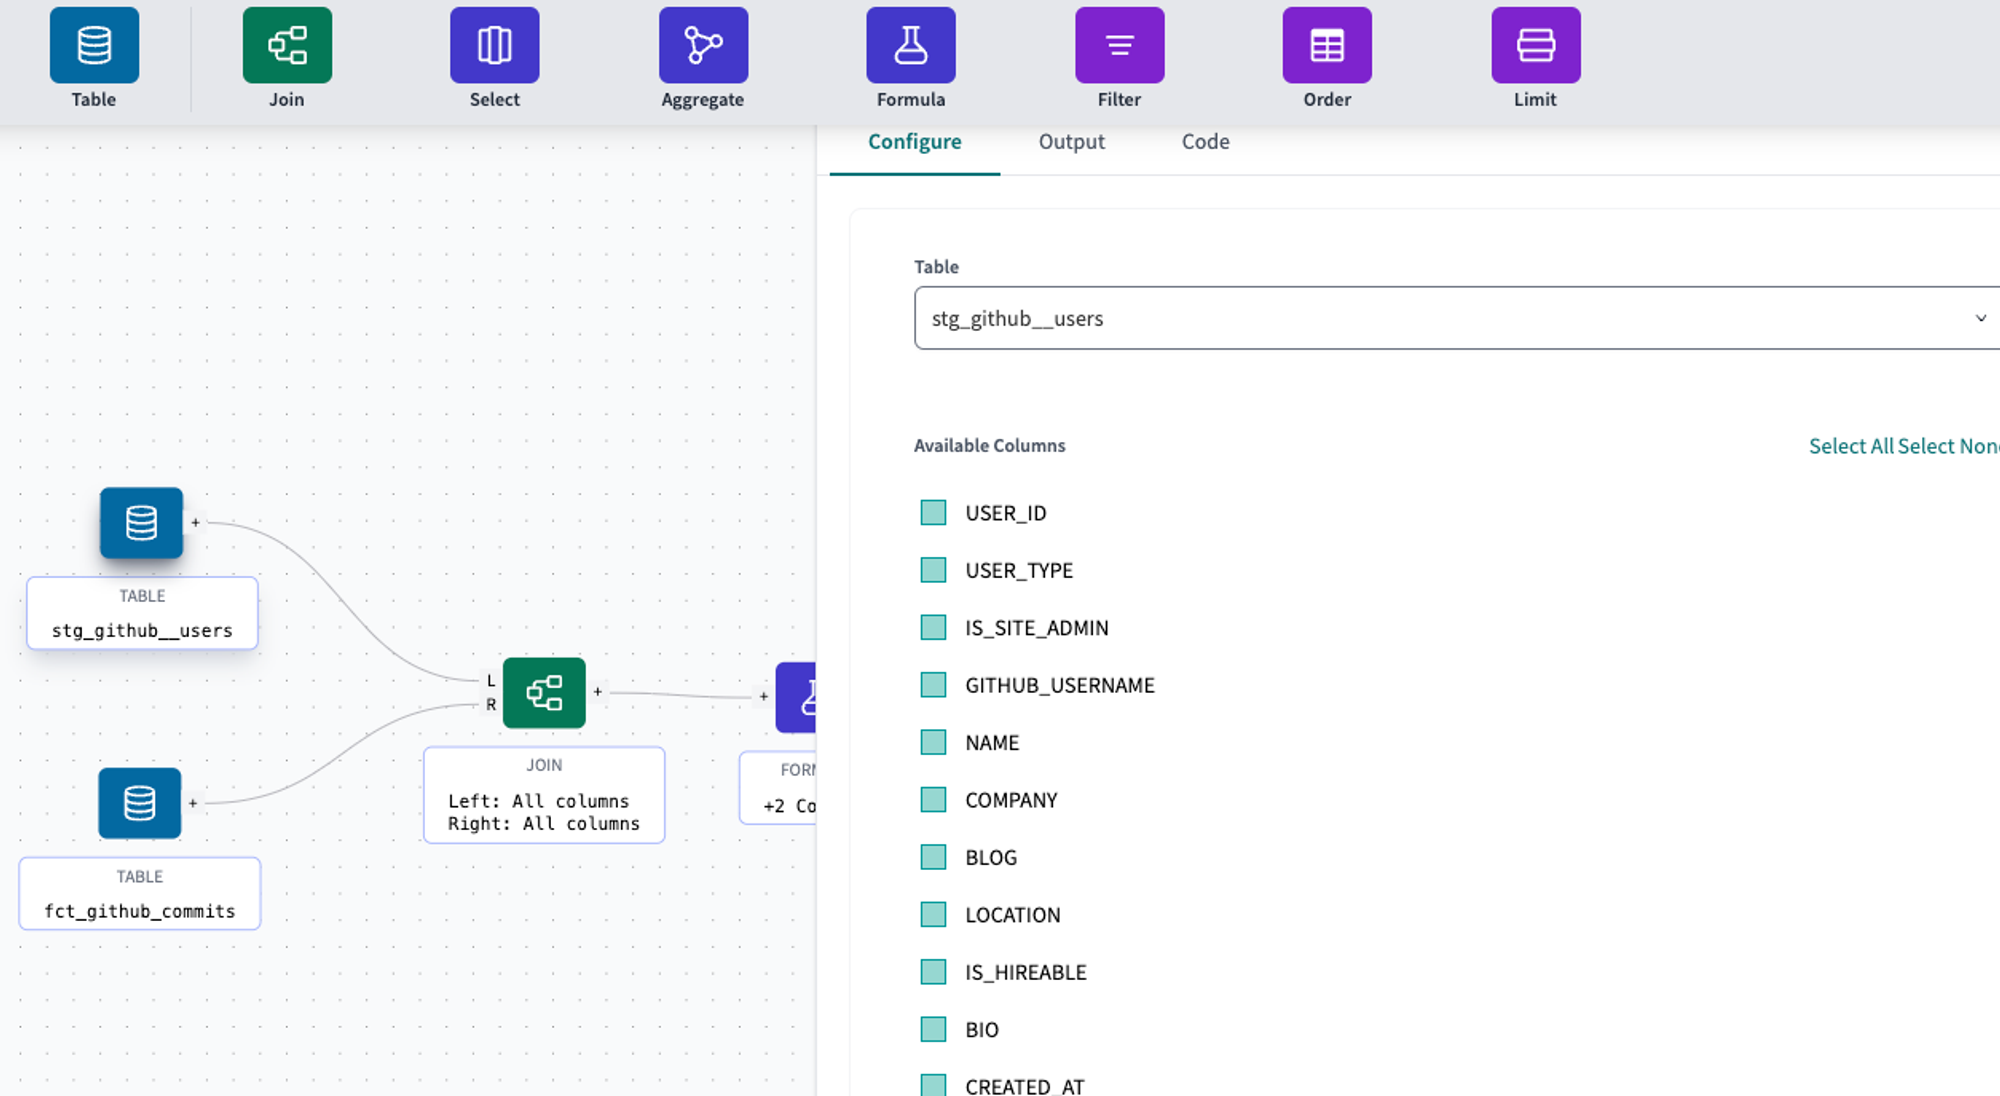
- Configuration panel — Each operator has a configuration panel that opens when you click on it. The configuration panel allows you to configure the operator, review the current model, preview changes to the table, view the SQL code for the node, and delete the operator.
Operators
The operator toolbar above the canvas contains the different transformation operators available to use. Use each operator to configure or perform specific tasks, like adding filters or joining tables by dragging an operator onto the canvas. You can connect operators using the connector line, which allows you to form a complete dbt model for your data transformation.
Here the following operators are available:
- Model: This represents a data model. Use this to select the source table and the columns you want to include. There are no limits to the number of tables you can have in a session.
- Join: Join two models and configure the join conditions by selecting which columns to include from each table. Requires two inputs. For example, you might want to join both tables using the 'ID' column found in both tables.
- Select: Use this to 'select' specific columns from a table.
- Aggregate: Allows you to perform aggregations like GROUP, SUM, AVG, COUNT, and so on.
- Formula: Create new columns using custom SQL formulas. Use a built-in AI code generator to generate SQL by clicking the ? icon. For example, you can use the formula node to only extract the email domain and ask the AI code generator to help you write the SQL for that code extraction.
- Filter: Filter data based on conditions you set.
- Order: Sort data by specific columns.
- Limit: Limits the number of rows returned back.
When you click on each operator, it opens a configuration panel. The configuration panel allows you to configure the operator, review the current model, preview changes to the model, view the SQL code for the node, and delete the operator.
If you have any feedback on additional operators that you might need, we'd love to hear it! Please contact your dbt Labs account team and share your thoughts.
Canvas
The visual editor has a sleek drag-and-drop canvas interface that allows you to create or modify dbt SQL models. It's like a digital whiteboard space that allows analysts to deliver trustworthy data. Use the canvas to:
- Drag-and-drop operators to create and configure your model(s)
- Generate SQL code using the built-in AI generator
- Zoom in or out for better visualization
- Version-control your dbt models
- [Coming soon] Test and document your created models
 The operator toolbar allows you to select different nodes to configure or perform specific tasks, like adding filters or joining tables.
Connector
Connectors allow you to connect your operators to create dbt models. Once you've added operators to the canvas:
- Hover over the "+" sign next to the operator and click.
- Drag your cursor between the operator's "+" start point to the other node you want to connect to. This should create a connector line.
- As an example, to create a join, connect one operator to the "L" (Left) and the other to the "R" (Right). The endpoints are located to the left of the operator so you can easily drag the connectors to the endpoint.
Configuration panel
Each operator has a configuration side panel that opens when you click on it. The configuration panel allows you to configure the operator, review the current table, preview changes to the table, view the SQL code for the operator, and delete the operator.
The configuration side panel has the following:
- Configure tab — This section allows you to configure the operator to your specified requirements, such as using the built-in AI code generator to generate SQL.
- Input tab — This section allows you to view the data for the current source table. Not available for table operators.
- Output tab — This section allows you to preview the data for the modified source table.
- Code — This section allows you to view the underlying SQL code for the data transformation.


